2.28.2010

Recipe 15: Slow cooker risotto with edamame

I wanted something yummy while I spent more time painting this weekend. It seemed like a perfect time to try a recipe i had been wanting to give a whirl for a while, Risotto with Edamame from the Not Your Mother's Slow Cooker Cookbook, which is one of my favorite cookbooks for some reason. I enjoy it because it isn't just 'put a piece of meat in your crock pot and cover with cream of mushroom soup'. This recipe intrigued me since I enjoy edamame and risotto, why not put them togheter? Plus, the idea of risotto in the crockpot intrigued me. This was a double bonus since i'm still in my meatless phase for a few more weeks. Any way I can get some good healthy protein in is a good one right now.

Materials
3 cups chicken broth (i used 1 can broth and 1 cup water)
1 cup shelled edamame
1 tbl olive oil
2 tbl unsalted butter
1 small yellow onion, chopped
1 cup arborio rice
1/3 cup parmesan cheese
salt and pepper to taste

Methods
Bring chicken broth to a boil in a saucepan. Add the edamame and bring cook acording to the package directions. Remove the edamame from the broth and set aside.
Heat oil and 1 tbl butter. cook onions, stirring periodically until softened. Add rice and cook for about 2 minutes. The goal is to turn the rice opaque.

Add the rice mixture to the slow cooker. Cover and cook for 1 hr 45 to 2 hr 15 until the rice is al dente with a bit of liquid left in the pot.

Stir in the cooked edamame and remaining tbl butter. Cover and and let sit for 5 minutes to fully melt butter and heat edamame. Sitr in cheese and salt and pepper and serve.
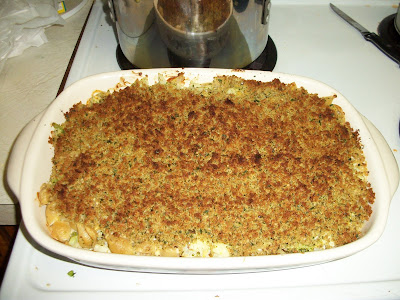
Results
This was pretty OK. I think I would make it again. I think I overcooked the rice in the pan before putting it into the crock, which resulted in it cooking up too fast and used up all of the broth. It wasn't as creamy as expected and wasn't really firm. However, I think I better understand what I'm looking for in the translucivity of the rice now. The recipe said it served 3 to 4. If I did the math correctly, 1/3 of this was 7 points for WW. I enjoyed it with a salad on the side. I look forward to either re-trying this or anoter recipe. in time I'll get the whole risotto cooking thing down pat :)

2.26.2010

Recipe 14: Pizza Margherita

Growing up, Friday night was pizza night. This Friday was no different in my household. I decided to make a pizza margherita. I also learned that margherita is not italian for a tequila filled drink, but rather italian for daisy! And margherita was a queen of italy in the late 1800's. who knew? That might explain why pizza margherita is one of my favorites! I do have a daisy dog who thinks she is a princess.

Materials
~ 1 refrigerated pizza crust
~ cornmeal
~ olive oil spray
~ 1 clove garlic
~ 4-5 roma tomatoes, sliced thinly
~ 1 1/2 cups mozzarella cheese shredded
~ 1/4-1/2 cup basil
~ salt and pepper to taste
~ olive oil
~ balsamic vinegar

Methods
Preheat oven to 400F. Spray a little oil on the top of a baking sheet. Dust sheet with cornmeal. Spread out the pizza crust. Bake for about 8 minutes and remove from oven.


Spray the surface of the crush lightly with olive oil. Cut garlic clove in half and rub garlic on pizza crust. Arrange the tomatoes on the crust, remaining 1/2 in. clear of the edge of the crust.


Sprinkle cheese evenly across the tomatoes. Slice basil into thin pieces and spread over surface. Add salt and pepper to taste. Mix equal parts balsamic vinegar and olive oil in a small bowl. sprinkle vinaigrette over pizza.. Bake for 12-15 minutes until cheese melts and beings to brown. Slice and enjoy!


Results
Two big thumbs up. I've said it before, pizza is comfort food for me and this totally hit the spot. It was a great Friday night meal. I think next time I'll add even more basil. One of these days I want to make my own dough instead of the prefab stuff. I accidentally forgot to spray my pan before I placed my pizza crust, but because of the cornmeal we had very few sticking issues :)
This will be a million times more yummy come summer when fresh tomatoes and basil are available. Add a little fresh, sliced mozzarella instead of prefab shredded and it would be absolutely amazing. note to self: make pizza margherita this summer. :)

Recipe 13: Broccoli and Cauliflower Casserole

To continue the 'vegetables i enjoy but have never actually cooked' theme, I made a broccoli and cauliflower casserole. Yes, I had never actually cooked fresh cauliflower before. This recipe was based on a macaroni and cheese with cauliflower in it. I was sick last week and i wanted some comfort food to bring me through the meal. I cut down the amount of pasta and added broccoli to up the impact.

Materials

~ 1/2 package whole wheat shells (6 to 7 oz shells)
~ 1 head cauliflower
~ 2 broccoli crowns
~ 4 slices multigrain bread, torn
~ 1/2 cup parsley chopped
~ 3 tbl olive oil
~ salt and pepper to taste
~ 1 onion
~ 2 cups extra sharp cheddar grated
~ 1 1/2 cup reduced fat sour cream
~ 1/2 cup fat free milk
~ 1 tbl stone ground mustard


Methods

1. Preheat oven to 400 and cook the pasta. Coarsely chop the cauliflower and broccoli. Add them to the pasta for the last 3 minutes. Remove and drain veggies and pasta.


2. Meanwhile, tear break and pulse in food processor until coarse crumbs are formed. Add parsley, 2 tbl oil, and salt and pepper. [note -- i would only use 2 pieces of bread next time] Chop onion finely.


3. Add 1 tbl oil to the bottom of the pasta pot. Cook onions, salt, and pepper until the onions soften. Add cheese, sour cream, milk, mustard, and pasta. Mix. [note -- i added cheese, sour cream, milk, and mustard and mixed thoroughly before adding pasta and veggies. i recommend this method to get adequate mixing]


4. Place mixture in a baking dish and cover with bread crumbs [4 slices of bread made waaaay tooo many breadcrumbs]. Bake until golden brown, about 15 minutes. Makes about 6 servings


Results
It was pretty OK. This met the casserole comfort food standard, although more cheese or a lot of butter and full fat milk or cream would have made it much more yummy. As i noted above, waaaay too much topping. It was still good, and servings were giant!


2.22.2010

Recipe 12: Baked Salmon with Goat Cheese

To makeup for missing last week's Fishy Friday, I made baked Salmon with goat cheese, based on a recipe from one of my favorite cookbooks, 15-Minute Single Gourmet. The recipes aren't totally gourmet, but I really like the fact that Mitchell generally uses my favorite types of ingredients: fresh. Not having 3 days of leftovers is a nice plus too!

Materials
~ 1/4 tsp olive oil
~ 1 garlic clove, minced
~ 8 oz can of tomatoes
~ 1 tsp fresh rosemary, chopped
~ pinch crushed red pepper
~ dash ground black pepper
~ 1 salmon fillet
~ 1 tbl goat cheese

Methods
Preheat oven to 375F. Meanwhile heat olive oil over medium heat. Add garlic and cook until tender.


Add tomatoes, rosemary, and red and black pepper. Quarter the tomatoes and cook for a few minutes to reduce the sauce.


Meanwhile, spray a baking pan with olive oil and place salmon fillet skin side down. Pour the tomato sauce over and around chicken. Place pat of goat cheese on top of fillet. Cover and bake for 10-12 minutes until cooked through.

Verdict
I enjoyed my dinner over a bit of angel hair pasta I had sitting in the cupboard. I felt like this dish was ok. I wouldn't say it was great but I wouldn't say it was horrible. I always enjoy tomatoes and cheese, so that worked well together.
However, today was not my superstar day in the kitchen. I'm not a fan of measuring, so I imagine I didn't have enough rosemary (but it was nice to step outside and just pull some fresh rosemary off of my bush). The original recipe called for a tsp of minced shallot instead of garlic. I would either use the shallot or up the garlic quotient. I forgot to get a shallot at the store and was down to my last clove. Perhaps a little more pepper would have done it. It just needed something to make it pop. Also, the recipe called for 1/2 cup of tomato juice, however I was being blonde and used all of the juice. I think that worked in my favor though. Finally, I'm so dense that I was out of foil. I covered the dish with parchment paper, but I imagine it would cook better with foil. So not a losing meal, just nothing super spectacular.

So in summary if I made this again i would 1. use more spices, 2. use more garlic/shallot, and 3. cover it up properly when cooking.

2.18.2010

Recipe 11: Faux-strone

I wanted soemthing hearty and soupy for supper tonight since I've been down with a sore throat, presumably due to the weather. Since I'm vegetarian for Lent (except when out and allowed to use meat based stocks due to Vicksburg being Vicksburg) and I didn't want to spend very long in front of the stove, my options were fairly limited. I threw together this faux-minestrone to satisfy my craving.

Materials
~ 1 1/3 cup whole wheat penne (uncooked)
~ 2 cups chicken stock
~ 1 can fire roasted tomatoes with garlic
~ 2 cups frozen tuscan vegetables (zucchini, cauliflower, carrots, lima beans, red peppers, italian green beans
~ 1 tsp basil
~ parmesan cheese

Methods
Cook the penne until al dente according to package. Meanwhile, combine chicken stock, roasted tomatoes (including juices), vegetables, oregano, and salt and pepper to taste in a medium sized pan. Add cooked penne. Bring to a boil and allow to simmer for about 15 minutes to allow flavors to meld. Makes 3 servings. Top each serving with paremsan cheese.

Verdict
Yummy!! A great, fairly hearty soup that hit the spot. I heart soup. It is one of my favorite things about winter. So much of a favorite that I even make it during the summer! The fire-roasted canned tomatoes really helped to give this soup a good flavor. This is definitely a keeper in terms of a quick soup with 'in the pantry' type goods. I would consider adding some red kidney beans or increasing the pasta to 2 cups next time I make this to make it a little more hearty, but that really isn't necessary.

Recipe 10: Bacon and Pineapple Flatbread Pizza

I made this one a while ago, but haven't had time to get it uploaded. For me, pizza is comfort food, serious comfort food. No need to hook me up with grandma's fried chicken, bring me some cheese covered, tomato based goodness. When I think of Fridays during childhood I think of Gus's Pizza, preferably cheese or italian beef. One day I was introduced to bacon pizza (food of the gods perhaps?), and later in life we discovered pineapple and canadian bacon on pizza. My tastes are more mature now, but I still adore pizza. This was my take at a slightly more adult, and slightly less unhealthy version of the good stuff.

Materials
~ 1 large tortilla (I have fallen in love with some tortillas that they sell at the Fresh Market)
~ Olive oil spray
~ tomatoes (roma or grape)
~ 3 slices canadian bacon
~ 1/2 cup fresh pineapple
~ shredded mozzarella
~ shredded Parmesan
~ oregano

Methods
Preheat oven to 350. Place tortilla on a baking sheet and spray lightly with your olive oil spray. Thinly slice the tomatoes and place them in a layer on the tortilla. I prefer the grape because they are bite sized. I used enough tomatoes to fully cover the tortilla. Cover with mozzarella cheese (about 1/4 cup). Chop canadian bacon and pineapple into bite sized pieces. Place bacon and pineapple atop the cheese. Drop a little more mozzarella and some parmesan atop the pizza. Season with salt/pepper/oregano as desired. Bake until the tortilla is crispy and cheese is melted.

Verdict
Obviously not the full-on real-deal, but still pretty darn good! I enjoyed the pizza, particularly the fresh tomatoes rather than a tomato sauce and the fresh pineapple. Fresh is definitely key for the pineapple. The tortilla was a little difficult to cut, but that might be an artifact of the super fiber rich tortillas I'm currently loving on.

Note: I have a picture of this somewhere.... my computer and my camera just don't seem to be very friendly today.

2.16.2010

Recipe 9: Cha Cha Chili

I swear I'm not a slacker. Between travel and a kitchen painting project I haven't done too much cooking lately. However, during our recent snow day I decided some delicious crock pot goodness was necessary. This recipe is based on the 1-2-3 -4 Chili with Beef and Beans from the Not Your Mother's Slow Cooker Cookbook

Materials:
~1 1/3 lb ground round
~1 large yellow onion, chopped
~4 cloves garlic, minced
~2- 15 oz cans pinto bans, rinsed and drained
~2- 14.5 oz cans Rotel
~1- 6-oz can tomato paste
~1 Bottle Beer (preferably Mexican)
~1- 6-oz tomato paste can filled with water
~2 tsp chili powder
~1 tsp ground cumin
~1 tsp dried oregano

Methods:
1. Brown ground round and cook onions and garlic until beef is fully cooked and onions and garlic have been softened.

2. Transfer to slow cooker. Add remaining ingredients. Stir to well to mix ingredients. Cook on high 4-5 hours, stirring towards end of cook time.

3. Serve with your carbohydrate of choice and enjoy! I topped it with some Colby cheese, nonfat yogurt and avocado chunks.

Verdict:
It was good, but had more kick than I planned for. For my Yankee tongue, the yogurt was required to bring the heat down a notch. It definitely hit the spot on a good 'winter' day, however, it isn't the yummiest chili I've ever made. I still look forward to eating the remainder over the rest of this winter's week.